This is how AutoGen Studio 2.0 lets you build a team of AI Agents
Let's explore AutoGen Studio 2.0, the web application that lets us easily manage AI Agents, their skills, and how they collaborate to complete a task.

Gonna be honest, I’ve stumbled upon AutoGen a few times before but it never really caught my attention… But last week, I came across AutoGen Studio and after spending a few hours with it, I realized what a powerful tool it is.
Watch this tutorial on YouTube
What is AutoGen?
AutoGen is an open-source framework that is based on research from teams at Microsoft Research, Penn State University, and the University of Washington.
The framework enables building AI agents that communicate with each other to accomplish a given task.
These agents are like team members, each one skilled in a specific area but they work together, just like humans do, to accomplish a common goal.
Think of AutoGen as a project manager for AI, making sure the AI agents involved in the team, work together effectively to complete one or more tasks. The possibilities are limitless since so many real-world processes that involve the collaboration of team members, could be emulated by an AutoGen application.
Use cases
AI Agents could be built to perform tasks such as:
- Travel planning
- Reservations
- Customer support
- Research and analysis
Conversable and Customizable Agents
Agents in AutoGen can start or continue a conversation with each other and also be customized to integrate a combination of LLMs, human input, and tools.
Agents can seamlessly integrate with many LLMs, including, GPT, Gemini, or local and open-source LLMs by using tools like LM Studio and Ollama.
What is AutoGen Studio?
AutoGen Studio is a web application built on top of the AutoGen framework. It simplifies setting up, managing, and testing multi-agent workflows as it offers an easy-to-use user interface.
This lets developers eager to build AI agents quickly dive in without a steep learning curve.
Installing AutoGen Studio
Let's take this baby for a spin! Open your terminal and follow the steps below.
Step 1: Create the project directory
mkdir agstudio-demo
cd agstudio-demo
Step 2: Create and activate an environment
I'm using venv for this tutorial, but you can choose Conda instead.
python3 -m venv agstudio
source agstudio/bin/activate
Step 3: Install AutoGen Studio
pip install autogenstudioSuper simple. Installing autogenstudio does everything for us, next, we'll need to run the application and browse the studio's UI.
Step 4: Add your OPENAI_API_KEY
AutoGen Studio will pick up your OpenAI API key from the environment when it's calling OpenAI models, to set this up, simply type the below in your terminal and hit return:
export OPENAI_API_KEY="YOUR_KEY_HERE"Step 5: Launch AutoGen Studio UI
In the terminal, type the following and hit return:
autogenstudio uiYou're then going to see that Uvicorn is running, in my case, it's running on http://127.0.0.1:8081/build, as shown here:
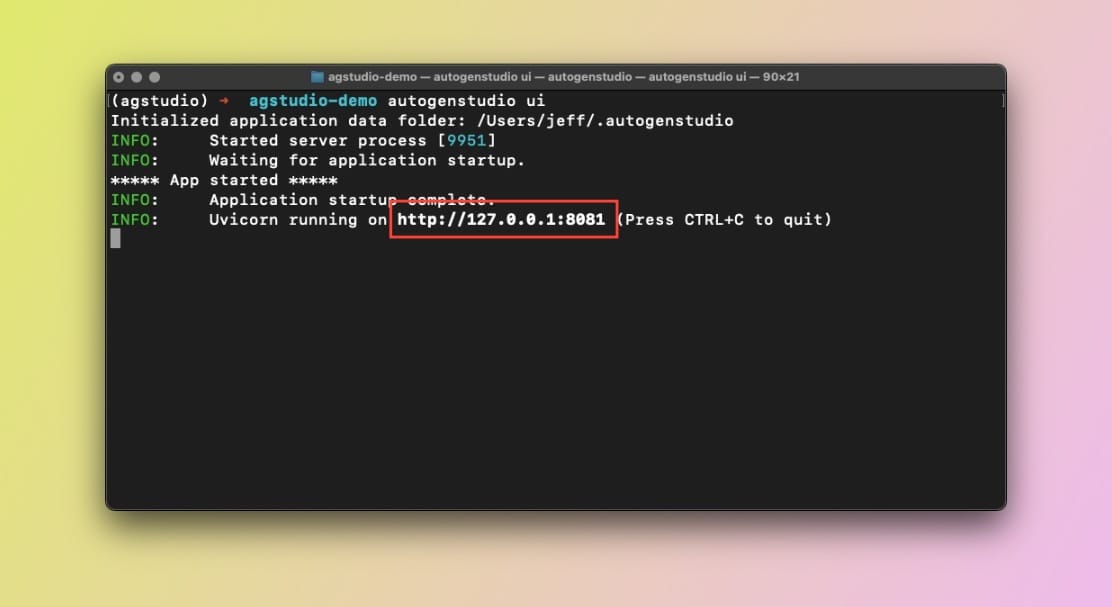
autogenstudio in macOS terminalNow, let's grab the URL and paste it into your browser:
Voila!

Overview of the AutoGen Studio UI
To keep this post simple, I'm going to go over each section within the AutoGen Studio UI just you familiarize yourself with the features and UI.
If we look at the left sidebar, we'll see the following items:
- Skills
- Models
- Agents
- Workflows
Let's see what each one does.
AutoGen Studio: Skills
Agents can have one or more skills, and that's where we create them. Skills specify how a problem can be solved, in Python code.
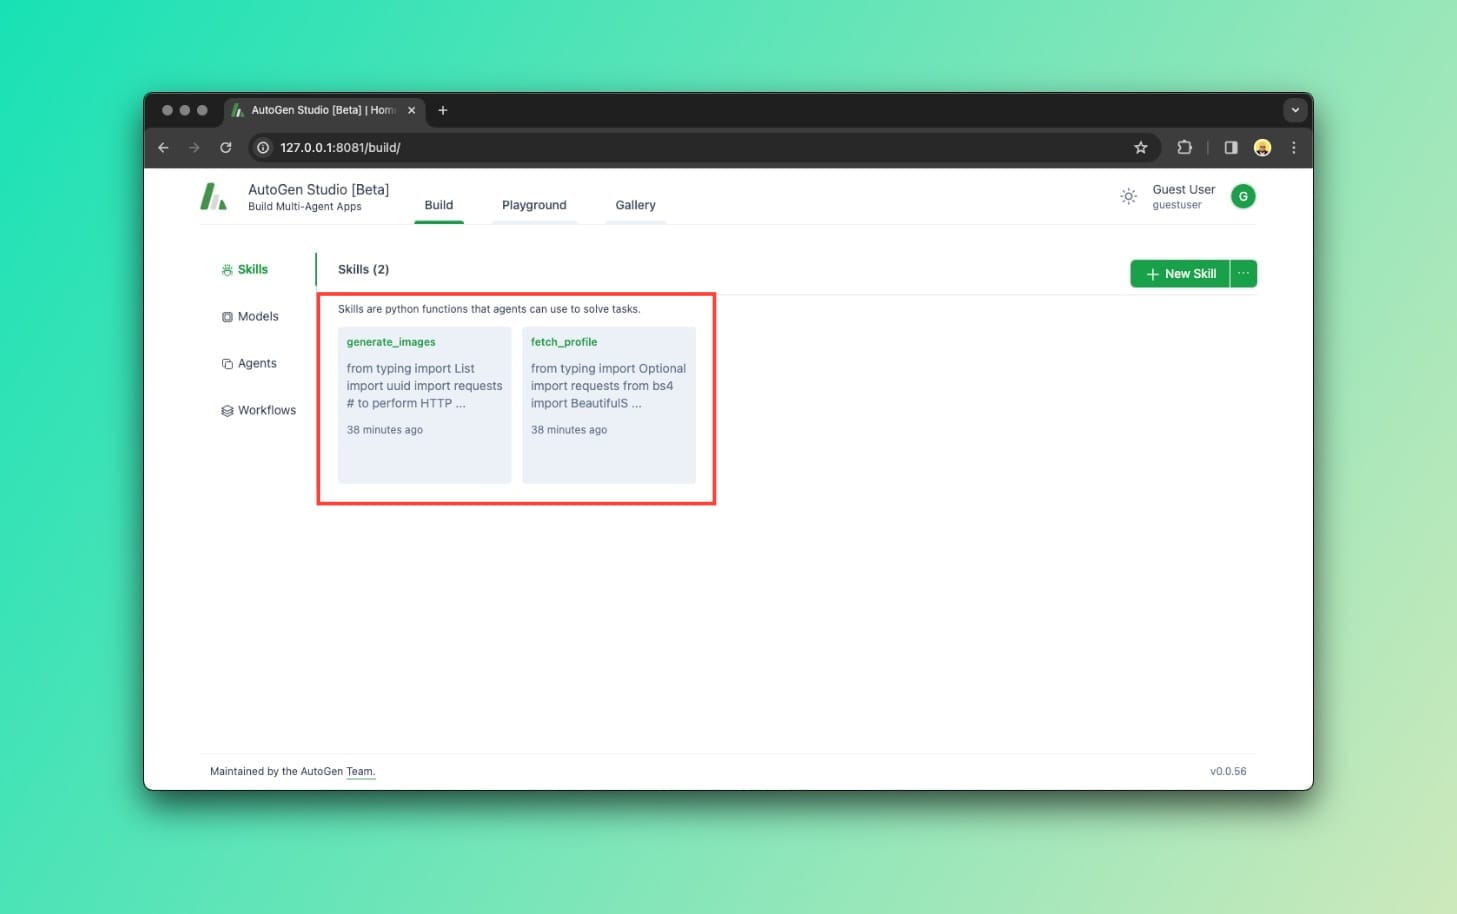
Skills in AutoGen Studio 2.0As shown above, we can see two out-of-the-box skills:
generate_imagesfetch_profile
If we take a look at generate_images for example, we can clearly see that the Python code is calling the DALL-E-3 model on line 19 to generate an image given a prompt.
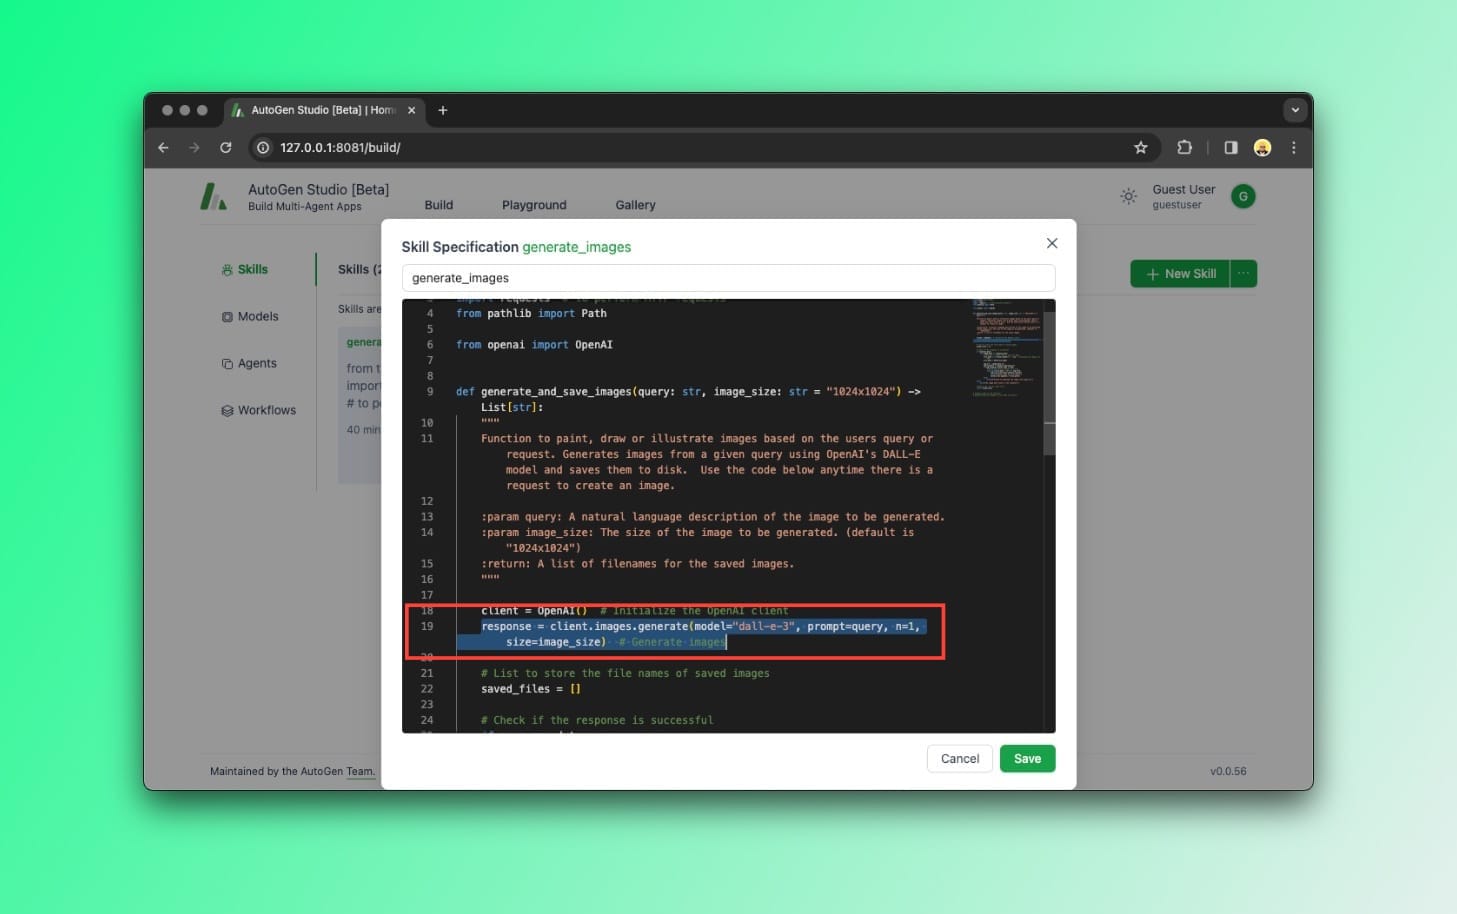
generate_images screenshot of Python codeSimilarly, if you want to create a new skill within your application, let's say you want to scrape data from a URL, you could write a Python script that uses BeautifulSoup to achieve this. Then, your new skill would be available to your agents.
AutoGen Studio: Models
This one is obvious. That’s where we can manage model configurations. For instance, OpenAI’s GPT-4 is already configured by default.
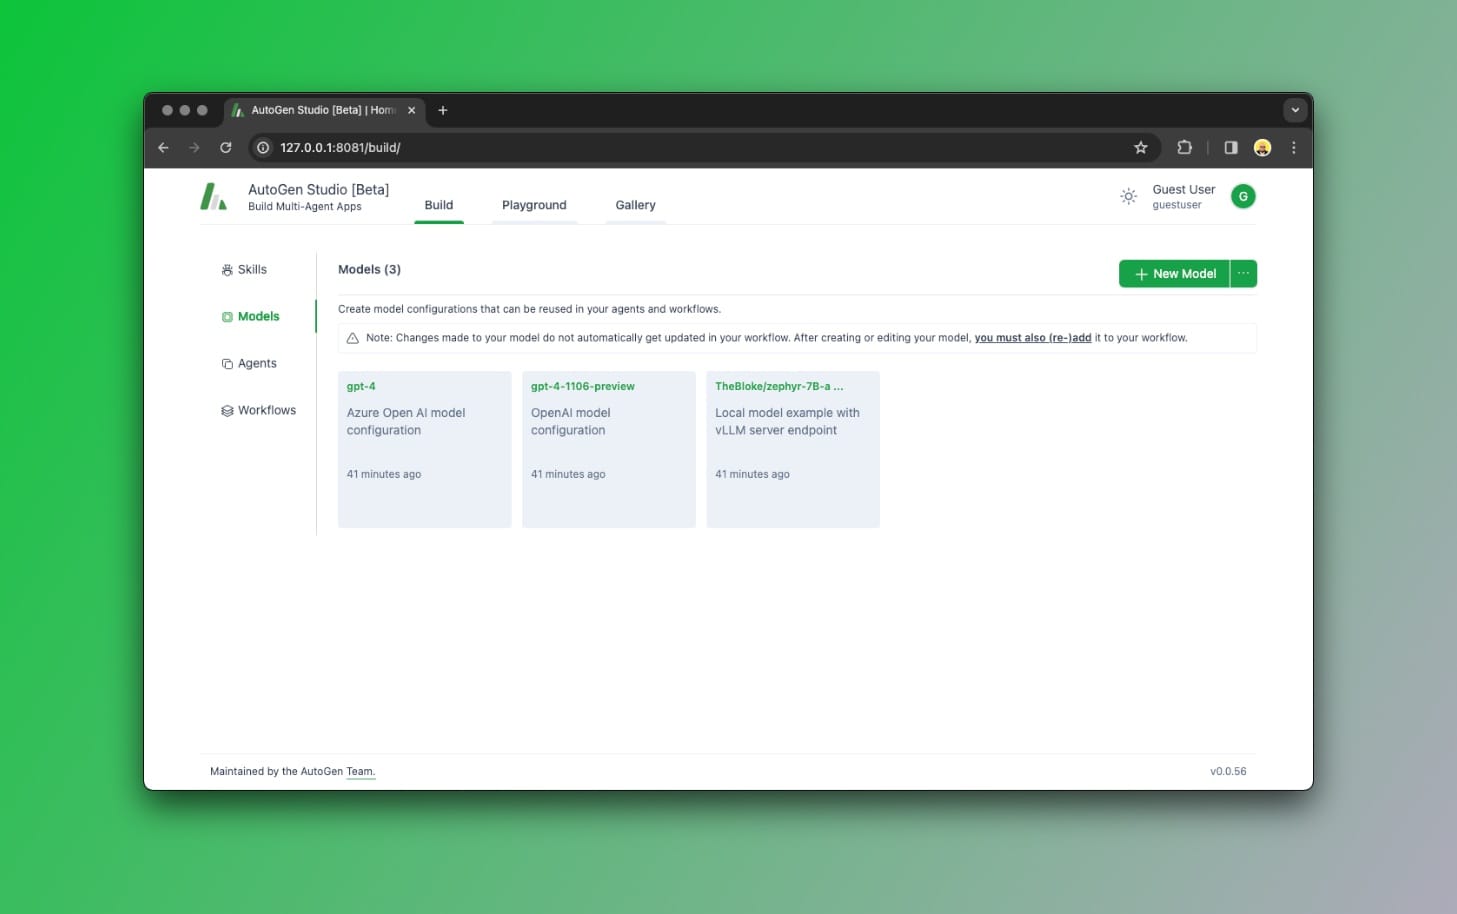
You can configure other models, including local LLMs, by clicking the "New Model" button at the top right of this screen.
An AI Agent can have multiple models attached to it, but they are used in the order that they are specified.
So let’s say you add GPT and Gemini to one of your Agents. GPT would be used by default, but if it fails, the agent will fall back to the next model in the list, in this case, Gemini.
AutoGen Studio: Agents
Agents are what this is all about, right? That’s where you can manage Agents. An AI Agent is a piece of software that can act on its own to achieve a goal.
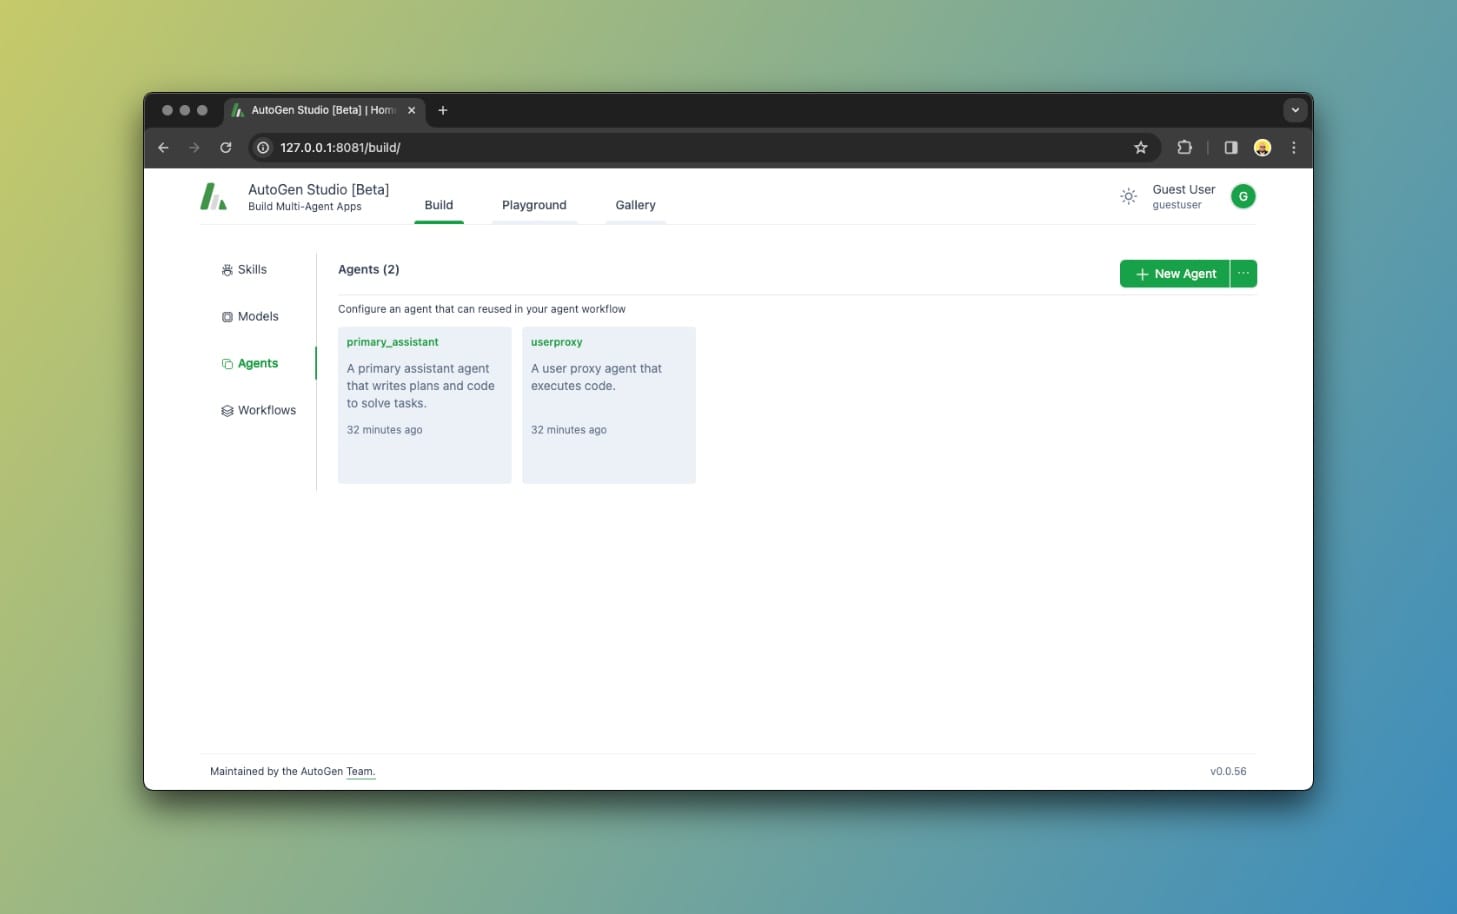
Using AutoGen Studio, we can easily create and manage Agents. An Agent in AutoGen is characterized by having the following properties:
- Name: A name for the Agent, like "assistant".
- Description: An explanation of what the agent does.
- Max Consecutive Auto Reply: A limit to how many times the Agent responds automatically before requiring human input.
- Default Auto Reply: How should the Agent reply if no code was executed.
- Human Input Mode: Determines when to ask for human input. Possible values are "Always", "Terminate", and "Never".
- System Message: Gives the model instructions about how it should respond based on a description.
- Model: Specifies which models to use.
- Temperature: Determines the randomness of the model's output, lower value is more random while higher is more accurate.
- Skills: One or more skills the Agents have access to.
By default, there are two Agents:
primary_assistantuser_proxy
The primary_assistant agent will handle all requests using the specified models and skills. The user_proxy agent relays and executes code on behalf of the user.
AutoGen Studio: Workflows
We use Workflows to define how Agents coordinate with each other to complete a request. The most basic Workflow is called Two Agents, which involves well, two agents as we've seen above.
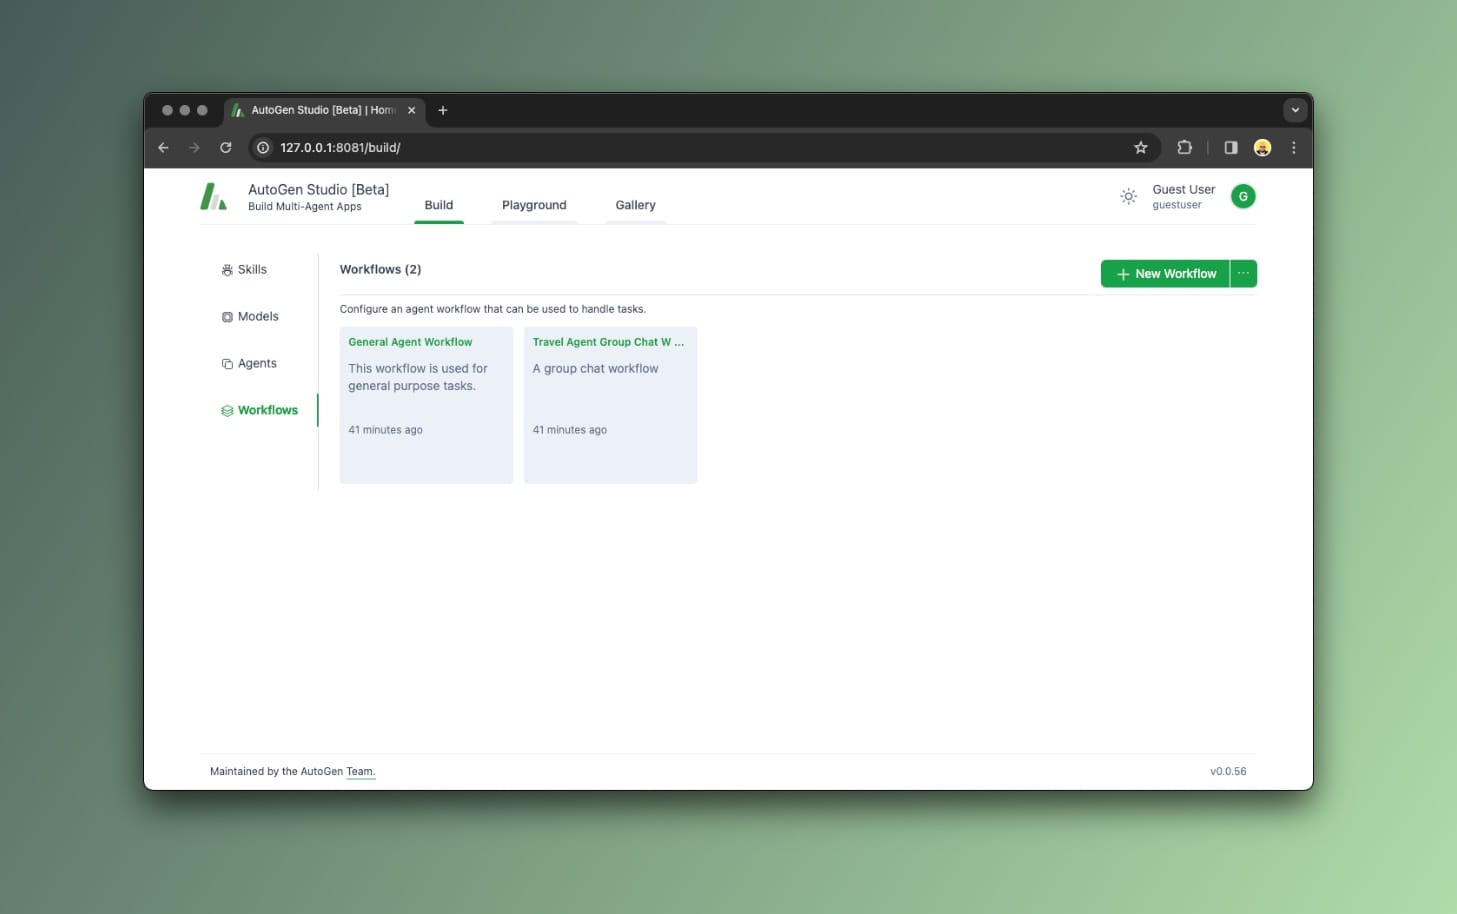
If we look at the General Agent Workflow that comes in preloaded with AutoGen Studio, we see that it involves a userproxy and a primary_assistant.
How this works is that when you start a conversation, your request is sent by the userproxy agent to the primary_assistant agent which then responds with code that the user proxy can execute within your environment, on your behalf.
Now, there is another important Workflow type, called Group Chat, and this one involves a user proxy and a group of agents. The agents are added to the Group and you can then specify how they coordinate with each other.
The AutoGen Studio Playground
Now, that's where it gets interesting... When everything comes together.
If you navigate to the Playground section, you'll see that you can create a new session. This prompts you to select which Workflow to use first, then, you can start a conversation.
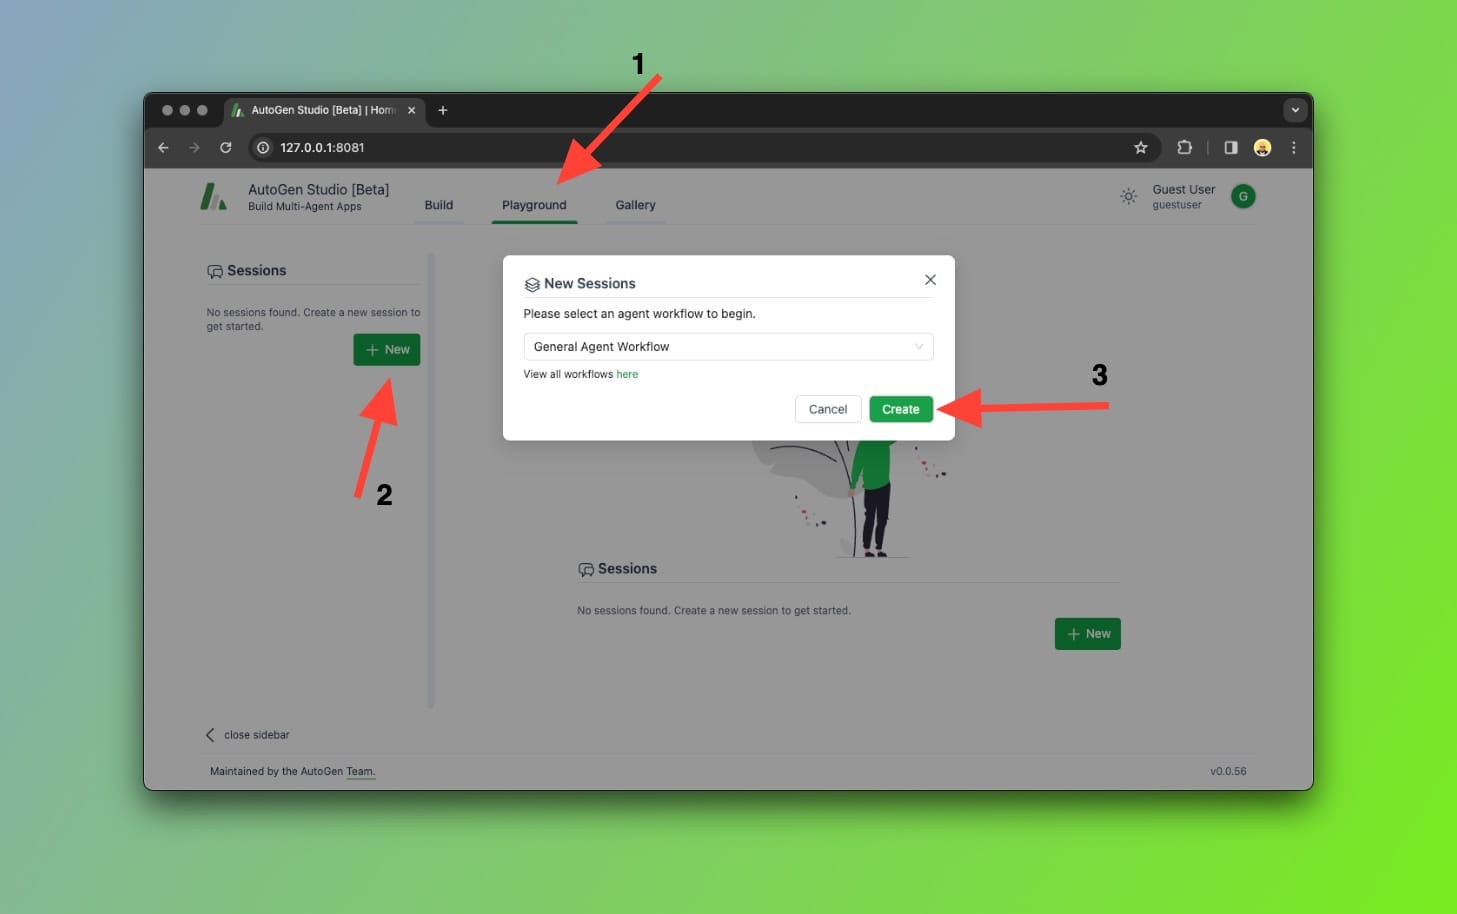
By doing so, you can watch how your Agents talk to each other and behave to complete your request. To be honest, it's a joy watching your creations come to life, so make sure to give it a try.
Thoughts...
AutoGen Studio simplifies building multi-agent apps built on top of the AutoGen framework.
I believe that agents will play a crucial role in next-gen applications due to the fact that they can efficiently perform mundane tasks in a few minutes that would normally take us many hours, or days to complete.
It's worth noting that the Studio is currently under active development so expect that some screenshots from this tutorial may not be accurate in the future, or that you may run into issues.
In case this happens, please drop a comment below and I'll update the post!
What would you look to learn next about AutoGen Studio? Let me know in the comments!